
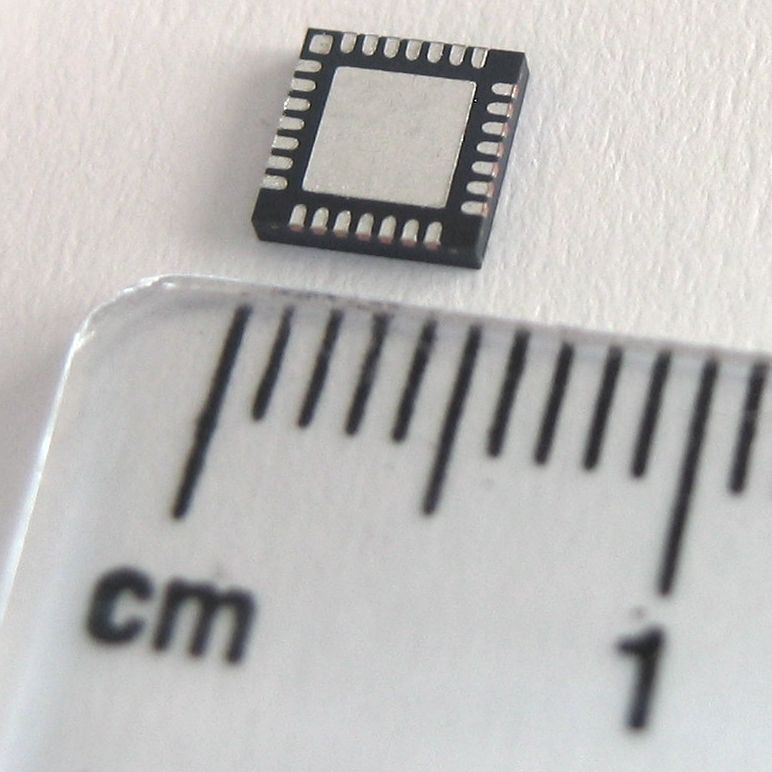
It's definitely an interesting project because everything has to be made as small and low-power as possible, in order to have it be completely portable and so that you don't have to constantly worry about the battery dying. I decided to go with a rechargeable lithium polymer battery (specifically this one) since they have great energy density and charge rates. I found a fantastic chip which is built to charge a single cell LiPo at up to half an amp from a 5V source, which is great for USB charging. I'd also gotten some experience soldering QFN (leadless) surface mount parts over the summer, and I thought it'd be neat to design a board with these to make it as small as possible.
I wanted to branch out in microcontroller selection and pick a new architecture that I could learn about. I ended up going with an STM32F050 because it's quite powerful for how much it costs, and it's a good match for the features I need.
Other than that, I picked:
- a fast barometer (many of them could only be read as fast as once a second, but this one gives up to 200 readings per second) so that I can get an accurate reading of pressure to calculate altitude from.
- a loud 4KHz buzzer so that it would be easy to hear
- an FTDI USB to UART bridge so that I could program it over USB
- a 3.3V buck converter, because the LiPo battery outputs anywhere from around 3.6 to 4.2 volts, and everything runs on 3.3V. The buck converter isn't completely necessary because it could be replaced with a linear regulator, but I figured it was worth it to pay a few cents more for something like 20% longer battery life due to the extra efficiency.
- a bunch of 0603 (metric 1608) passive resistors, capacitors, and LEDs, as well as a few miscellaneous parts like buttons, an inductor, etc.
I started out with a quick block diagram of how I wanted to hook everything up:

I forgot to label Vdd from the STM and the BMP180, but they're going to the 3.3V buck output, not the battery voltage.
I basically sat down for a day or two and CADed all of the part packages using Eagle, and put together a schematic that pretty closely follows the block diagram above, plus a bunch of passives, buttons, and a couple other things.

Unfortunately I was in one of those ultra-focused "make this project without thinking about anything else" states while putting this together, so I forgot to take screenshots showing the process.
One interesting challenge was that I wanted the whole board to be completely powered off while not in use, turn on when a button is pressed, and then be able to turn off when the same button is pressed again. Since I'm only using on/off tactile buttons, I had to get a little creative in order to build this behavior. Basically the buck converter's enable pin (EN) is hooked up to a microcontroller output, so the microcontroller can drive it low to turn off power to everything (including the micro itself). The power button is also hooked up to EN, so that when the board is off and you press the power button, the buck converter turns on, turning on power to the whole board. The micro then has to immediately hold EN high in order for the buck to stay on when you release the button. So far so good, right? The one problem is that the micro has to have a way of knowing when you hit the power button a second time, so that it knows when to turn off the buck and power down. I ended up coming up with a resistor divider pulls a pin on the micro low whenever the micro is driving EN, and pulls the pin high when the button is driving EN, allowing the micro to read the state of that pin to decide if it should power off.
With the schematic out of the way, it was time to lay out/route the board! I wanted all the parts to be on one side so that I could put a battery flush on the other. Here's what I was looking at after placing components:

You can't tell from the picture, but the battery connector (bottom right) is actually on the underside of the board to make it easy to plug the battery into. The yellow lines are "airwires", or connections that haven't yet been physically made. The whole board comes in pretty small at just under 2" by 1", which I'm pretty happy with.
Routing time! This is one of my favorite parts of making boards, it always creates some interesting challenges, especially with smaller boards. Once again, I was in in-the-zone-mode, so I forgot to take pictures of the process.

Looking back I'm a little unhappy with what I consider slightly sloppy routing, all those vias (connections from one side to the other) in the center look pretty messy. Oh well, for revision 1, as long as it works right?
I decided to go with Seeed Studio to get the board fabricated, for smaller boards like this they have an awesome deal of 10 boards for $10, not counting shipping. After placing the order, it was time for the few weeks of eager anticipation that I've come to know over the last year or two since I started making boards.
Of course, it's always worth it when you get a package in the mail and suddenly it feels like Christmas. Here's the top and bottom, with a quarter for scale:

Sorry for the picture quality, maybe one of these days I'll stop spending all my money on skydiving/engineering projects and actually buy a camera instead of using my phone.
Of course as soon as I got these I put everything else aside and rushed to populate one of these with parts, so here's a picture taken a few hours later with everything soldered on:

From there I moved on to trying to turn on the board, and immediately starting having a few problems with the buck converter that it took me a while to get to the bottom of. After decreasing the bypass capacitance on the VCC line I was able to get it to boot up, which allowed me to start programming the microcontroller. Time to learn how the STM32F050 works! Fortunately there's a lot of example code and guides around which make it pretty easy to get things going. I won't go into to much detail about how the code works, I don't think it's useful to paste a bunch of lines of initialization/etc here, so instead I'll describe what I generally did. I started out writing a basic program which holds the buck's EN pin high, turns on the yellow LED, and turns on the blue LED whenever the "ZERO" button is pressed. After getting that all working, I noticed some weird behavior where the board would turn off seemingly randomly. I eventually realized that putting my finger on the top of the board was what was causing it to turn off, most specifically whenever I touched the buck converter. Hmm. It turns out that I had used a large resistor in my voltage divider (the one described above) which caused the EN pin on the buck to be sort of floating, and the transient produced by touching it with your finger was enough to bounce it low, causing the whole board to turn off. Once I knew about this I actually elected not to patch in a bypass capacitor on EN (which would fix the issue), because while debugging I actually prefer the option to have a quick "hard off" available (where the off button is basically touching the EN on the buck).
From there I moved on to figuring out how PWM works on these chips and wrote a function to drive the piezo at different frequencies (e.g. a low frequency/relatively quiet 'boop' when it boots up). I continued to fiddle with it for a week or two, then more or less set the board aside for a while to focus on schoolwork. This semester I have a bit more free time, so I picked the board back up a few weeks ago and continued to work on the code for it. I²C, the communication protocol that the barometer uses, was particularly difficult to get working. I learned that I should have included an extra header for debugging I²C because I had to measure everything by jamming scope probes into the tiny vias on the I²C signal lines. After a few days of working on it, though, I finally got the two chips successfully talking and was able to get a pressure reading out of the barometer.
I took a snapshot of the communication between the microcontroller and the pressure sensor with an oscilloscope:

The other board you can see is ST's awesome Discovery board, which runs for $10 and has an STM32F1 that you can program, as well as a built-in ST programmer which I'm using here to program my board. On the scope, you can see that the first eight data bits (blue) write out 11101110 where they coincide with the clock pulses (yellow). Converted to hex, this is 0xEE, which is the 'write to' address of the barometer, meaning that I'm telling it I'm about to write data to it. The next clock pulse after this is the barometer pulling the data line low, which is an I²C 'ACK', or acknowledgement that it received the previous byte. After that, you can read 11110110, or 0xF6, which is the micro telling the sensor which address it wants to read from (in this case, the address where the last pressure reading is stored). Not currently shown on the scope, the altimeter then sends out its 'uncompensated' pressure reading, which the micro uses (along with a variety of factory calibration parameters previously read from the barometer's memory over I²C) along with a temperature to calculate the 'true' pressure, and then calculates altitude from the pressure.
I had been debugging everything from my laptop, and using debug mode to keep track of variables, which I decided wasn't a great solution for actually tracking how the measured altitude changed as I moved around. I ordered a cheap LCD from ebay and threw it on a breadboard with an Arduino to try and get a portable display which would read out the altitude difference from the zero point in real time, allowing me to run up and down tall buildings and see how well it tracks changes. Because of the way the I²C protocol works, you're able to add new devices to your communication lines whenever you want, which allowed me to simply add the Arduino onto the existing I²C line in order to talk to it. Unfortunately this required somewhat sketchily soldering thin wires onto very small pads on the pull-up resistors on my board, but once I got them there I coated them with hot glue to keep them in place.

Unfortunately, while for some reason the Arduino reads its address correctly (sends an ACK) and does appear to read some of the data sent to it, I've got a bug somewhere because somehow it's not actually reading the data I'm sending. It'll probably take another few days of poking at the Arduino to get it to read data in properly, but my board itself seems to be working as I want it to, for the most part. Pretty close to having it actually be usable for skydiving! I'll probably 3D print a case for it as well.
That's the current state of my altimeter board, I've also got a new project that I'm really excited about (and just ordered boards for!) which I'll write up in the next post.
From there I moved on to figuring out how PWM works on these chips and wrote a function to drive the piezo at different frequencies (e.g. a low frequency/relatively quiet 'boop' when it boots up). I continued to fiddle with it for a week or two, then more or less set the board aside for a while to focus on schoolwork. This semester I have a bit more free time, so I picked the board back up a few weeks ago and continued to work on the code for it. I²C, the communication protocol that the barometer uses, was particularly difficult to get working. I learned that I should have included an extra header for debugging I²C because I had to measure everything by jamming scope probes into the tiny vias on the I²C signal lines. After a few days of working on it, though, I finally got the two chips successfully talking and was able to get a pressure reading out of the barometer.
I took a snapshot of the communication between the microcontroller and the pressure sensor with an oscilloscope:
The other board you can see is ST's awesome Discovery board, which runs for $10 and has an STM32F1 that you can program, as well as a built-in ST programmer which I'm using here to program my board. On the scope, you can see that the first eight data bits (blue) write out 11101110 where they coincide with the clock pulses (yellow). Converted to hex, this is 0xEE, which is the 'write to' address of the barometer, meaning that I'm telling it I'm about to write data to it. The next clock pulse after this is the barometer pulling the data line low, which is an I²C 'ACK', or acknowledgement that it received the previous byte. After that, you can read 11110110, or 0xF6, which is the micro telling the sensor which address it wants to read from (in this case, the address where the last pressure reading is stored). Not currently shown on the scope, the altimeter then sends out its 'uncompensated' pressure reading, which the micro uses (along with a variety of factory calibration parameters previously read from the barometer's memory over I²C) along with a temperature to calculate the 'true' pressure, and then calculates altitude from the pressure.
I had been debugging everything from my laptop, and using debug mode to keep track of variables, which I decided wasn't a great solution for actually tracking how the measured altitude changed as I moved around. I ordered a cheap LCD from ebay and threw it on a breadboard with an Arduino to try and get a portable display which would read out the altitude difference from the zero point in real time, allowing me to run up and down tall buildings and see how well it tracks changes. Because of the way the I²C protocol works, you're able to add new devices to your communication lines whenever you want, which allowed me to simply add the Arduino onto the existing I²C line in order to talk to it. Unfortunately this required somewhat sketchily soldering thin wires onto very small pads on the pull-up resistors on my board, but once I got them there I coated them with hot glue to keep them in place.
Unfortunately, while for some reason the Arduino reads its address correctly (sends an ACK) and does appear to read some of the data sent to it, I've got a bug somewhere because somehow it's not actually reading the data I'm sending. It'll probably take another few days of poking at the Arduino to get it to read data in properly, but my board itself seems to be working as I want it to, for the most part. Pretty close to having it actually be usable for skydiving! I'll probably 3D print a case for it as well.
That's the current state of my altimeter board, I've also got a new project that I'm really excited about (and just ordered boards for!) which I'll write up in the next post.